Continuous deployment to the Windows Store
Last week Microsoft released an API to add submissions to your app in dev center. With that API they also released an VSTS extension that is using that API to get continuous deployment working from VSTS. Unfortunately the extension is somewhat limited and doesn't support flighted submissions (yet?). Maybe that still to come but in the meanwhile i build my own extension that supports also lighted submissions. Beside that flighting support it also has a nice task to automatic increase the version number. That is normally been done by Visual Studio but also missing.
You can get the extension from the gallery. In this blog post i will explain how you can setup an automated build solution with release management by using this extension.
Download and install the extension
First (and most important ;) ) get my extension from the gallery: https://marketplace.visualstudio.com/items?itemName=davesmits.windows-store-automation you can easily install it in your VSTS account via this link.
Configure the dev center account
It will only work if your dev center account is linked to Azure Active Directory. In AAD you then need to register an application that will have access. You will need the TenantID, ClientID and Client Secret. How to get this is very well explained here: https://github.com/Microsoft/windows-dev-center-vsts-extension#obtaining-your-credentials
When you acquired these tokens you go to the settings page of you team project and there to the services tab. Add new add point and click for dev center. You will get this popup
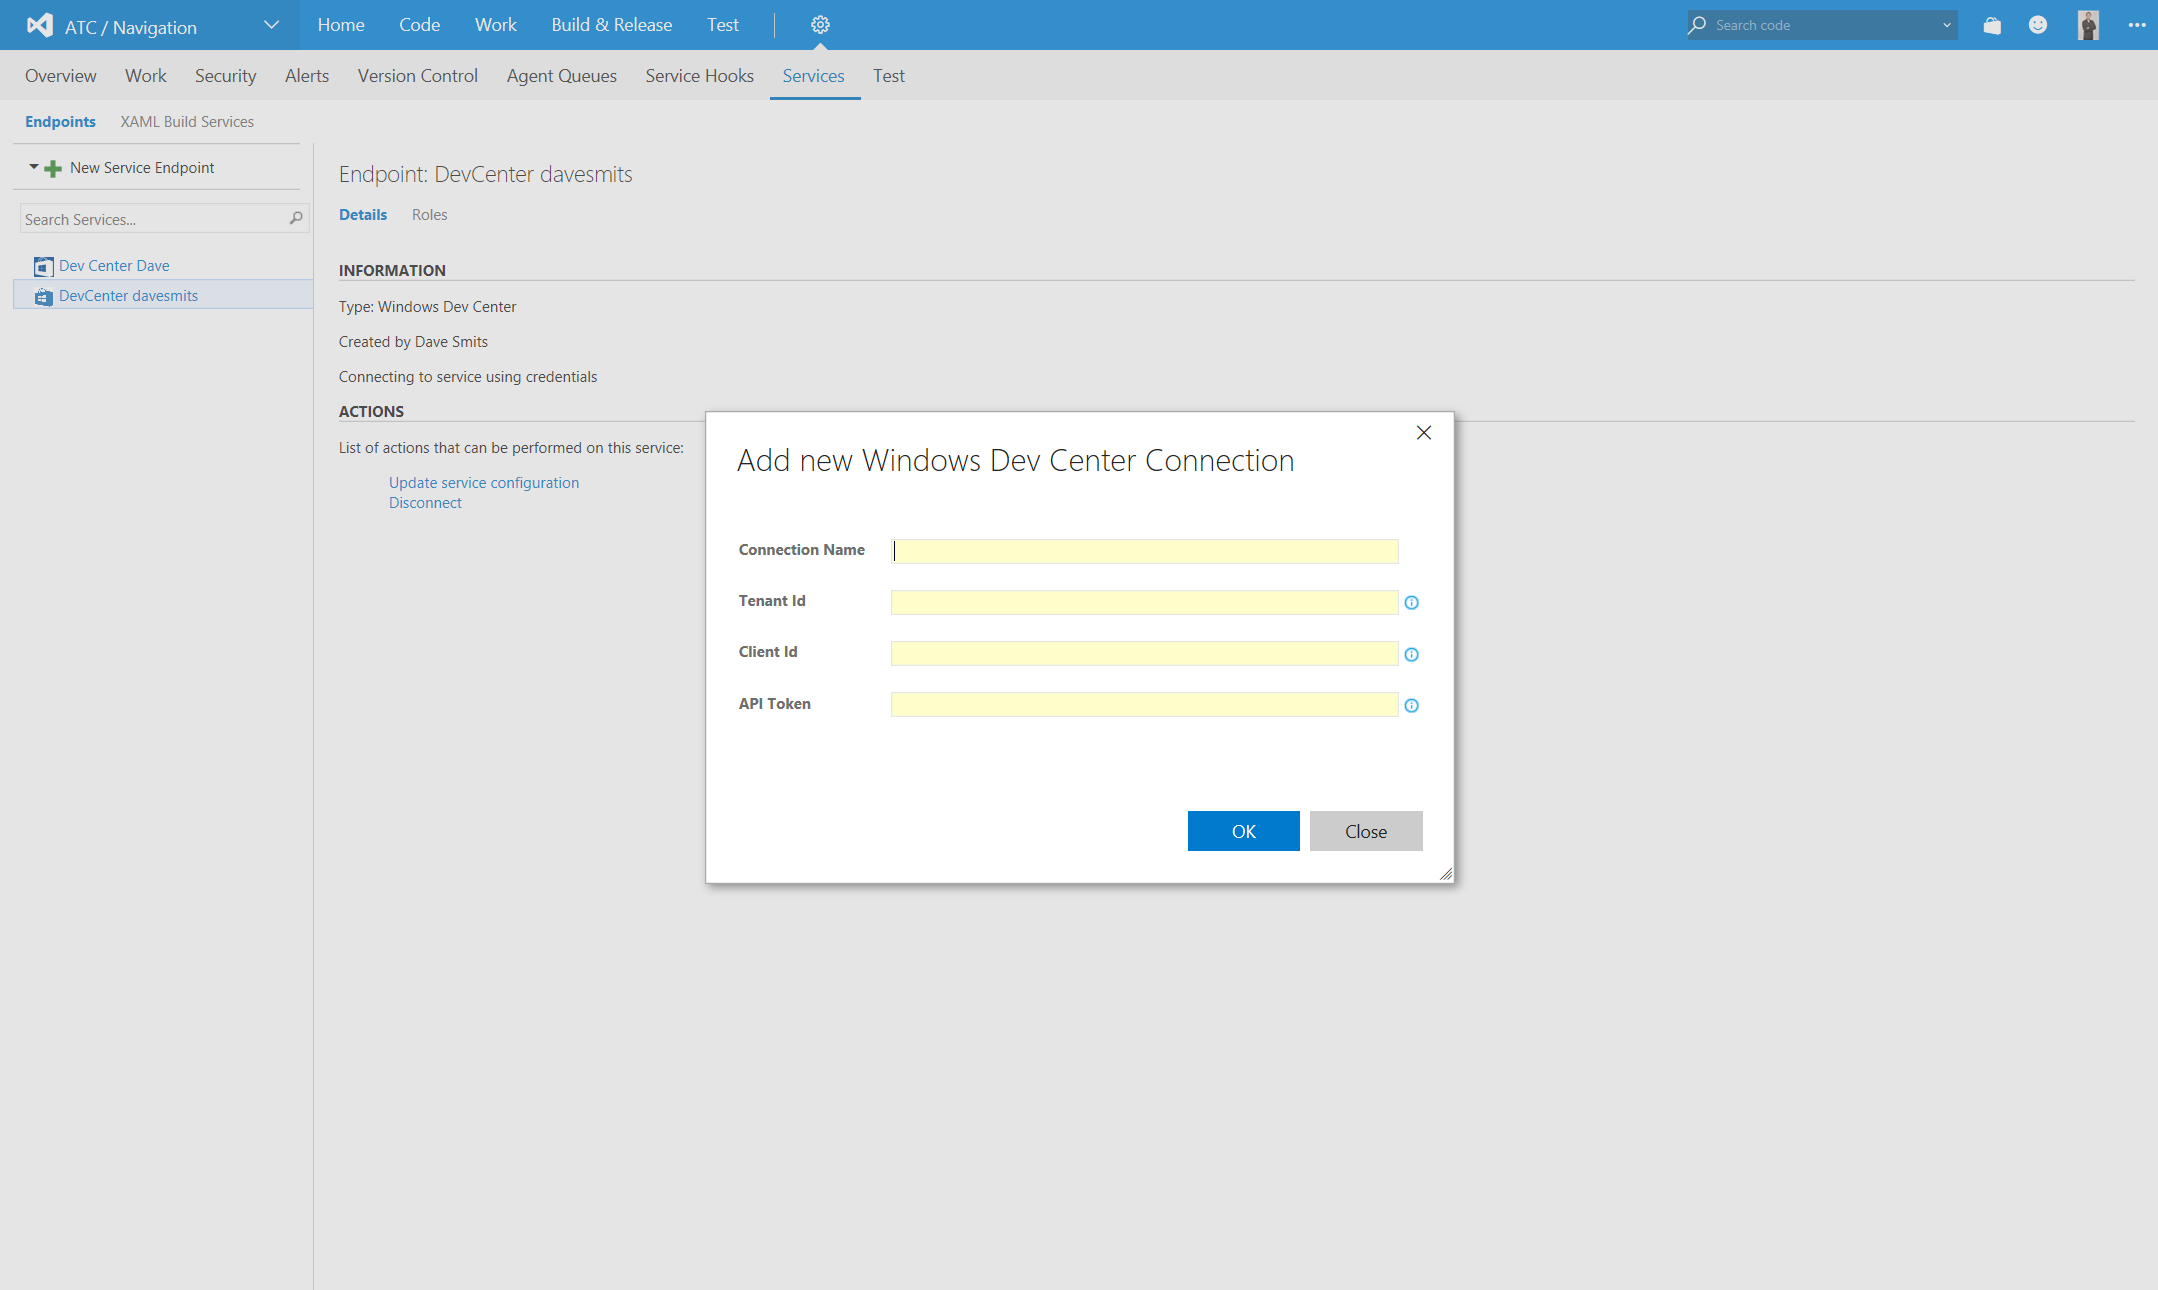
The connection name you can fill in something that identities the connections for you and fill in the tokens you acquired. API Token is the client secret.
Configure the Build
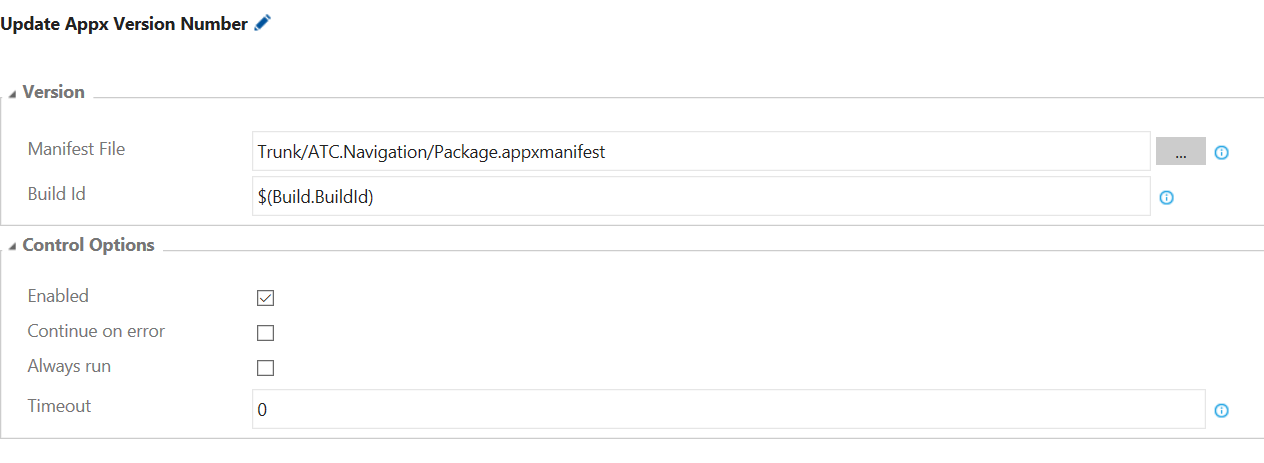
Create a new build definition and select the UWP template. Make the following changes: 1. Create new variable named BuildPlatformSep and as value assign it to x86 2. Add new build step; Update Appx Version Number. Set this step on top of the tasks
- Configure the path to the manifest. you simply can use the file selector
- Configure the build id. this have to a number that will be used in your version number of the package. I always use the BuildId variable. So you can fill in $(Build.BuildId)
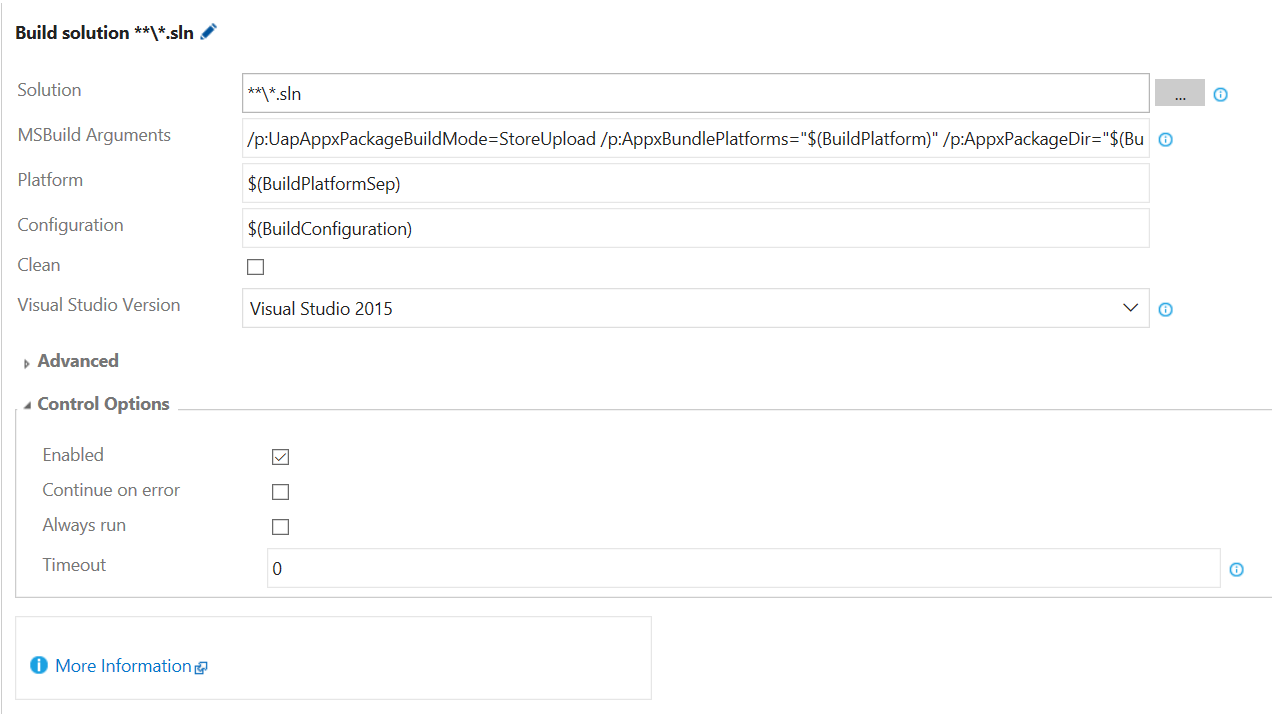
- In the Build Solution make the following changes:
- Change MSBuild arguments to: /p:UapAppxPackageBuildMode=StoreUpload /p:AppxBundlePlatforms="$(BuildPlatform)" /p:AppxPackageDir="$(Build.BinariesDirectory)\AppxPackages\" /p:AppxBundle=Always
- In platform fill in the new variable you made: $(BuildPlatformSep)
- Change MSBuild arguments to: /p:UapAppxPackageBuildMode=StoreUpload /p:AppxBundlePlatforms="$(BuildPlatform)" /p:AppxPackageDir="$(Build.BinariesDirectory)\AppxPackages\" /p:AppxBundle=Always
Configure Release Management
Create a new release definition. Pick the output of the build. In this sample i will do it for a flighted submission and a non flighted submission.
In the newly created definition create two envoriments. One for the flighted submission and one for the non flighted one.
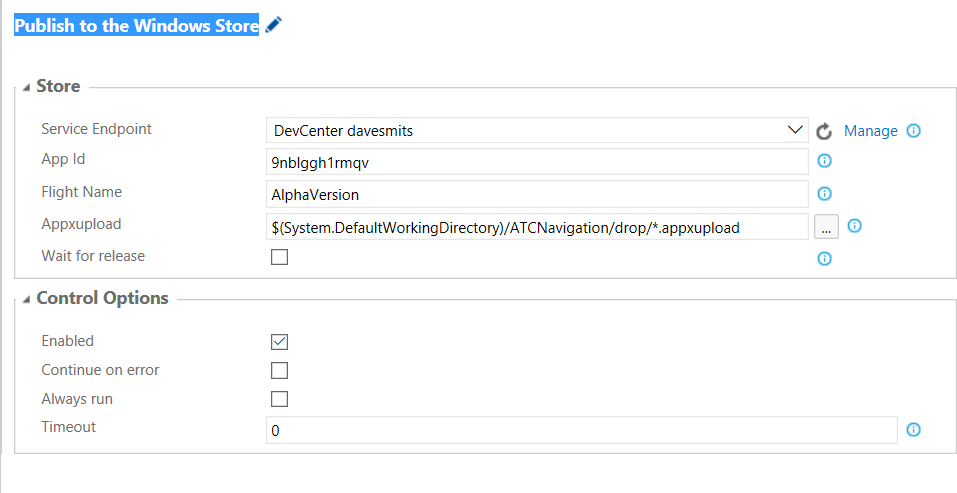
In both envoriments add the task "Publish to the Windows Store" and add the following configuration: 1. Selected the service endpoint you created earlier 2. Fill in your appid. You get find this in dev center. 3. For the fligthed envoriment fill in the name of the flight. for the non flighted version leave this field empty 4. in appxupload you can fill in /*/.appxupload 5. I recommended to leave wait for release unchecked. If you check it the task wont complete before the submission is been released. This potentially can take up to 5 days. For a hosted build server this is not a good idea.
You are now all set!